28.12.2022, 05:32
|
#79861
|
|
Местный
Регистрация: 04.10.2017
Сообщений: 107,495
Сказал(а) спасибо: 0
Поблагодарили 6 раз(а) в 6 сообщениях
|
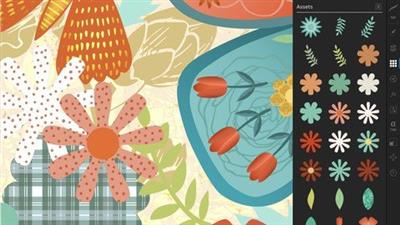
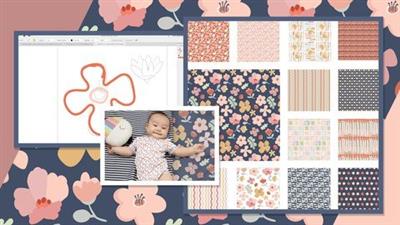
 Ad4 - Building A Robust Asset Studio In Affinity Designer 1
Published 12/2022
MP4 | Video: h264, 1280x720 | Audio: AAC, 44.1 KHz
Language: English | Size: 1.47 GB | Duration: 1h 10m
Stock Your Asset Studio with Elements You Can Use Over and Over
What you'll learn
Learn the step-by-step process for auto tracing with Adobe Capture, a free app
Learn how to use clipping masks to add textures to your assets
Learn how to create vector pattern files to add to your assets
Learn layering, color and design considerations in Affinity Designer
Requirements
Affinity Designer Beginner Classes are an asset
Description
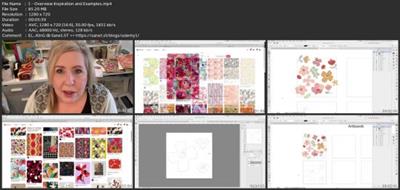
This class, Building a Robust Asset Studio in Affinity Designer, is the first in a second 3-part series to introduce you the Asset Studio and the creation of an intricate, layered, multi-faceted illustration. This class will illustrate the use of a symbol to create a symmetrical mirrored layout. I will be using a butterfly image as inspiration, and I will show you tons of inspiration. We create a bunch of flowers as well as other assets we deem usable for our final illustration. This first class in the series explores multiple methods for creating these assets. Of course, I am going to tie in plenty of tips and tricks to make it challenging for you. The great thing is, by the end of the class, you will all the info you need to produce assets of your own to fill your Asset Studio.I take you step-by-step through the whole process of auto-tracing as well, and I cover 3 methods for doing so, all free. Auto tracing is the basis for adding originally raster images, such as those done in Procreate, to your Affinity Designer Asset Studio as vectors. The Asset Studio is what makes the production of a series, or collection, attainable. The cool thing is that we can use the Asset Studio any time we open a new document. It travels with the program, and I will show you how to accomplish that. At the end of the three classes, you will have a professional illustration that can not only be enlarge beautifully but could also be the start of a beautiful collection for you.In this class I'll walk you through:my step-by-step method for auto tracing with Adobe Capturefree programs such as Vectornator and online converter to vectorizehow to use clipping masks to add textures to your assetscreating vector pattern files to add to your assetslayering, color and design considerationsThis class will reinforce everything you have learned thus far with Affinity, and my guidance will help you through any challenges that crop up. I strongly believe the class will benefit anyone looking to add vector illustration to their list of skills and accomplishments.The key concepts I will include:thinking and planning ahead when faced with a challenging projectpre-planning that will make the production of assets possibleefficiency with all aspects of vector art productionLearning another Affinity Designer skill is valuable, even if you are not sure what you will use the vector art for! Learning vector software workflows is essential in our profession and are deeply important for you to learn. We will do it, step-by-step, and this class will further reinforce all the Affinity Designer theory which is difficult to learn in isolation.Intro to Building a Robust Asset Studio in Affinity DesignerThis short intro will give you an overview of the class.Lesson 1: Overview and Layered Art that InspiresIn this lesson I will show you a ton of inspiration. I explain what style we are trying to achieve and introduce you to some wildly successful licensed artists.Lesson 2: Using the Asset Studio InterfaceIn this lesson, I will show you all the ins and outs of the Asset Studio. I explain all the menu items and demonstrate their use. We create and add an asset, so you see all the steps. I explain how you can adapt symbols you have to add those to the assets. The beauty of the asset studio is that it will be present in all future documents. It is worth the time to create a robust asset collection.Lesson 3: Raster and Vector Pattern ImportThis lesson is about importing patterns that we will later use in our composition. We create the pattern from scratch in Procreate, then auto trace it in Adobe Capture. I explain the Adobe Capture interface and considerations when tracing. We then import both raster and vector patterns and compare the quality when enlarging. Finally, we add these patterns to our asset library. In a later lesson, I will show you alternatives to Adobe Capture.Lesson 4: Flowers in Procreate vs AffinityI do a comparative analysis of the two methods for creating vectors. As we work our way through, I demonstrate this, then we do some fun experiments. I will show you how to add patterns to the motifs. I also show you how to make color adjustments using blend modes.Lesson 5: Other Asset Creation StrategiesIn this lesson, I will show you numerous other ways to create assets. You will use the transform studio in this lesson to repeat motifs in a circular pattern. I show you how to alter a repeated petal in several different ways by importing textures and changing the colors. We add several new assets to our Asset Studio in this lesson.Lesson 6: Rounding Out our Asset CollectionIn this lesson, I show you 2 alternate methods to create the tracing for vectors so that you can choose which one is best for you. I also explain why I strongly believe batching is the best way to round out your collection quickly, so that's what this lesson is all about.Lesson 7: Game Plan for Next Class and Wrap UpThis lesson is about inspiration and we will discuss plans for the next class in the series.Lesson 8: Conclusion and Wrap UpWe will conclude everything in this lesson. I show you alternate method for getting vectors. I talk about what I think is so great about Affinity Designer and we end with a chat about next steps.Concepts covered:Concepts covered include but are not limited to the Affinity Designer Asset Studio, Affinity Designer Vector Persona, Affinity Designer Raster Persona, layering, Affinity Designer Symbol Studio, Affinity Designer Transform Studio, Affinity Designer canvas settings, importing and applying textures, Affinity Designer composites, Affinity Designer Color Studio, shapes, color swatches and importing colors, texture fills, and much more.You will get.65.5 minutes of direction from an instructor who has been in graphic design business and education for over 40 yearsknowledge of multiple ways to solve each design challengeintroduction to a new illustration techniqueProject DescriptionWith today's project, I'd like to see you create a great collection of assets you can see using for this project and many more. Take and convert some of the symbols you created in the last two classes. Follow all the instructions in the classes to try each technique and judge what is the most efficient for you. Once complete, try using it on a mock-up! Check out the moackups on my Artist Resources tab of my website.
Overview
Section 1: Introduction
Lecture 1 Overview and Layered Art that Inspires
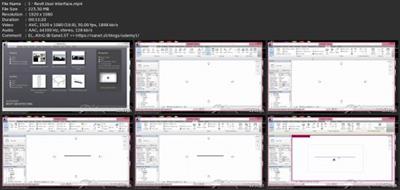
Lecture 2 Using the Asset Studio Interface
Lecture 3 Raster and Vector Pattern Import
Lecture 4 Flowers in Procreate vs Affinity
Lecture 5 Other Asset Creation Strategies
Lecture 6 Rounding Out our Asset Collection
Lecture 7 Lesson 7 Game Plan for Next Class and Wrap Up
Lecture 8 Conclusion and Wrap Up
iPad users looking to work in a vector environment to create repeat patterns,This class was produced in Affinity Designer 1 but works in AD2
Download link
rapidgator.net:
Код:
https://rapidgator.net/file/a0eda2341a3b836c2f017fa4ad2b300c/jvfgq.Ad4..Building.A.Robust.Asset.Studio.In.Affinity.Designer.1.part1.rar.html
https://rapidgator.net/file/266b1fe82201e84ab7e6f03a51cd991b/jvfgq.Ad4..Building.A.Robust.Asset.Studio.In.Affinity.Designer.1.part2.rar.html
uploadgig.com:
Код:
https://uploadgig.com/file/download/67f9e8cEe7cD2bBa/jvfgq.Ad4..Building.A.Robust.Asset.Studio.In.Affinity.Designer.1.part1.rar
https://uploadgig.com/file/download/5eef83E4d8cb8dB0/jvfgq.Ad4..Building.A.Robust.Asset.Studio.In.Affinity.Designer.1.part2.rar
nitroflare.com:
Код:
https://nitroflare.com/view/2569098DE5D32CC/jvfgq.Ad4..Building.A.Robust.Asset.Studio.In.Affinity.Designer.1.part1.rar
https://nitroflare.com/view/935A4D943FE9913/jvfgq.Ad4..Building.A.Robust.Asset.Studio.In.Affinity.Designer.1.part2.rar
|

|

|
|
28.12.2022, 05:33
|
#79862
|
|
Местный
Регистрация: 04.10.2017
Сообщений: 107,495
Сказал(а) спасибо: 0
Поблагодарили 6 раз(а) в 6 сообщениях
|
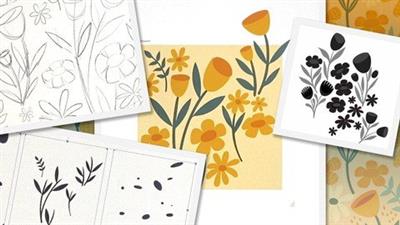
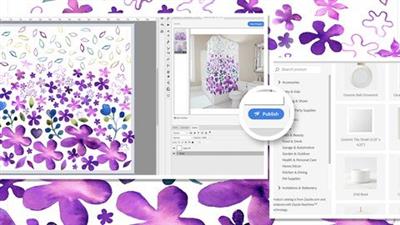
Ad 7 Create A Half-Drop Repeat Pattern In Affinity Designer
Published 12/2022
MP4 | Video: h264, 1280x720 | Audio: AAC, 44.1 KHz
Language: English | Size: 1.72 GB | Duration: 1h 25m
Draw in Procreate, Vectorize in Capture, Save as SVG for Designer, then Arrange in a Half Drop Pattern
What you'll learn
• drawing pattern parts in Procreate
• importing vectors into Affinity Designer as SVG files
• auto-tracing in Adobe Capture or your program of choice
• auto-tracing in Adobe Capture or your program of choice
Requirements
I recommend classes 1-6 in my Affinity Designer series
Description
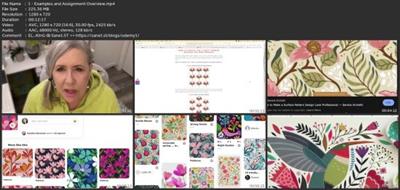
This class, Affinity Designer 7 - Create a Half-Drop Repeat in Affinity Designer, is the 1st in a 3-part series to reinforce what you have learned in Affinity Designer as it applies to Surface Pattern Design (7th in sequential order of all DeloresArt AD classes).This class is packed with so many important workflows which you will learn. To ease the transition from raster to vector, we will start in Procreate to do our sketches. Here we will do the rough planning for the half drop repeat. Once this is complete, we will also do the final inking. At this point, we take a break from the creative to produce the half-drop template. The beauty is that it is reusable, and I explain the importance of making a duplicate for future use.The next step in this workflow is to vectorize. We have done this in a previous class, so choose the method you liked the best. I will give you a quick run-through with Adobe Capture just to reinforce. There are some efficiency strategies that will help tremendously, so I explain that thoroughly. Once we bring the layers into Affinity Designer, we will align them and do a quick coloration to make the next challenge easier: grouping each motif so all parts move together.Slowly but surely, we will start to refine the pattern. There are many little things that come up, but I show you all of my troubleshooting, so that you can really understand what the goals are and what you must do to perfect the pattern.At the end, you will have a finished half drop repeat pattern ready for the next stage which will happen in class #2 of the series, Adding Embellishments.In this class I'll walk you through:drawing pattern parts in Procreateauto-tracing in Adobe Capture or your program of choiceimporting vectors into Affinity Designer as SVG filesgrouping multi-part motifsarranging in the re-usable half-drop repeat pattern template we will create in classperfecting the pattern and preparing for the next classWorking with repeat patterns in vector documents is another important skill to learn, and my guidance will help you through the questions you may have. This class will benefit anyone looking to add surface pattern design to their list of attributes.The key concepts I will include:layer management and efficiencieshow to perfect patterns in Affinity Designerworking with layers and groups in-depthAdding to your knowledge of vector software workflows is ideal in our profession and important for you to learn. We will create a repeat pattern, step-by-step, and think of further applications in future classes.Intro to Affinity Designer 7 - Vectorize Procreate Motifs, Import to Affinity Designer and Create a Half-Drop RepeatThis short intro will give you an overview of the class.Lesson 1: Examples and Assignment OverviewIn this lesson I will show you a ton of inspiration. I explain what you will need for the assignment you will be working on in class.Lesson 2: Design Process for Half-Drop Repeat in ProcreateIn this lesson, I go show you the entire process of sketching the pattern I want to create. My sketch is very rough, but I explain throughout the process what my rationale is for placement of motifs and how to deal with matching the pattern up on the seams. It doesn't have to be perfect as we will still be doing more at the beginning of the next lesson to make it work.Lesson 3: Inking of the Artwork for Auto-TracingThis lesson mainly takes place in Procreate. Once we have our artwork complete, we will take it into Adobe Capture to do the vectorizing, coming up in Lesson 5. There are a few considerations we will discuss in the lesson.Lesson 4: Setting Up the Re-Usable Half Drop TemplateTaking the time to produce this template is another efficiency strategy you will learn. Creating the template for the half-drop is not as hard as you would think (it is much easier than doing this in Procreate). I will guide you through all the steps and then show you how I label and reproduce it for the pattern we will be creating.Lesson 5: Vectorizing and Importing the MotifsIn this lesson, I show you what I think is the best method to import your vector items from Adobe Capture. We will do the initial step of colorizing each of the layer groups to prepare for the next step which is to individually group the individual motifs.Lesson 6: Grouping and Arranging the MotifsIn this lesson, I show you how to use the vectorized elements. We proceed to separating each of the motifs into its own group with all its parts. This will pave the way to the next stage which will be to perfect the layout.Lesson 7: Altering Arrangement for Best DesignWe will make adjustments to the layout including repeating elements that are off the background rectangle. This ends up being a good troubleshooting lesson for you as You watch me try to figure out a few issues.Lesson 8: Adjustments and Color to Perfect the LayoutThis lesson will show you how I think about perfecting and finishing the layout. I explain how to do some touch ups on the shape and how to fill in gaps. Then we will review a few of the changes I might be considering when it comes to color.Lesson 9: Additional Advice for Finalizing Your PatternI try to offer you some useful advice as we prepare for the next class in this series.Lesson 10: Conclusion and Wrap UpWe will conclude everything about this stage of the design process in this lesson. I gift you a bit of a pep talk. I encourage you to do a ton of research at this stage and we end with a chat about next steps.Concepts covered:Concepts covered include but are not limited to the half drop repeat patterns in Affinity Designer, Affinity Designer repeat pattern, Affinity Designer Studios, using Adobe Capture to vectorize, Affinity Designer Vector Persona, layering, how to group motif parts and organize layers, Affinity Designer Transform Studio, canvas settings, color schemes and variety with color to improve the pattern, Affinity Designer composites, Affinity Designer Color Studio, Affinity Designer Symbol Studio, shapes, color swatches and lightening or darkening a color quickly, and much more.You will get.109 minutes of direction from an instructor who has been in graphic design business and education for over 40 yearsknowledge of multiple ways to solve each design challengeProject DescriptionTake some time to do some research to settle on a style for your layered pattern. Follow the Procreate instructions to plan your half-drop repeat. Once complete, proceed to the inking stage. The next step is for you to auto-trace it using your favorite method. You could also choose to export your sketch and re-draw the motifs in Affinity Designer. It depends on your level of confidence and your preferred workflow. Follow the lessons to first of all colorize, and secondly, to separate each of your motifs. Once you have individually saved your motifs, adjust your pattern until you are happy with it. Take your time! This is a complex project with lots of steps.
Overview
Section 1: Introduction
Lecture 1 Examples and Assignment Overview
Lecture 2 Design Process for Half-Drop Repeat in Procreate
Lecture 3 Inking of the Artwork for Auto-Tracing
Lecture 4 Setting Up the Re-Usable Half Drop Template
Lecture 5 Vectorizing and Importing the Motifs
Lecture 6 Grouping and Arranging the Motifs
Lecture 7 Altering Arrangement for Best Design
Lecture 8 Adjustments and Color to Perfect the Layout
Lecture 9 Additional Advice for Finalizing Your Pattern
Lecture 10 Conclusion and Wrap Up
Budding surface pattern designers looking to learn vector based software
Download link
rapidgator.net:
Код:
https://rapidgator.net/file/1cd9c460efe5d8f6226789b02de04b30/rlpbb.Ad.7.Create.A.HalfDrop.Repeat.Pattern.In.Affinity.Designer.part1.rar.html
https://rapidgator.net/file/05bdef8e05be8e3bb4033deafb8ba4e8/rlpbb.Ad.7.Create.A.HalfDrop.Repeat.Pattern.In.Affinity.Designer.part2.rar.html
uploadgig.com:
Код:
https://uploadgig.com/file/download/4Ee26a189a1615b4/rlpbb.Ad.7.Create.A.HalfDrop.Repeat.Pattern.In.Affinity.Designer.part1.rar
https://uploadgig.com/file/download/5620ecB884388455/rlpbb.Ad.7.Create.A.HalfDrop.Repeat.Pattern.In.Affinity.Designer.part2.rar
nitroflare.com:
Код:
https://nitroflare.com/view/64ADFDFC61E1F57/rlpbb.Ad.7.Create.A.HalfDrop.Repeat.Pattern.In.Affinity.Designer.part1.rar
https://nitroflare.com/view/75ACC35C7AA101B/rlpbb.Ad.7.Create.A.HalfDrop.Repeat.Pattern.In.Affinity.Designer.part2.rar
|
|
|
|
|
28.12.2022, 05:35
|
#79863
|
|
Местный
Регистрация: 04.10.2017
Сообщений: 107,495
Сказал(а) спасибо: 0
Поблагодарили 6 раз(а) в 6 сообщениях
|
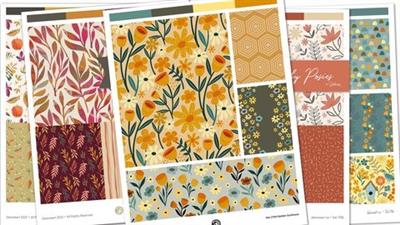
Ad9 Coordinates For Pattern Collection In Affinity Designer
Published 12/2022
MP4 | Video: h264, 1280x720 | Audio: AAC, 44.1 KHz
Language: English | Size: 1.43 GB | Duration: 1h 10m
How to Add Variety and Interesting Patterns to a Collection in Affinity Designer 1 for iPad
What you'll learn
• using your assets from the Asset Studio to make a new pattern
• creating stripes using two completely contrasting techniques
• creating a unique geometric pattern
• tips for creating compositions for a new iteration of the hero pattern
• adjusting colors until satisfied with a color scheme and keeping it simple enough to change later
Requirements
I recommend completing DeloresArt Affinity Designer classes 1 - 8
Description
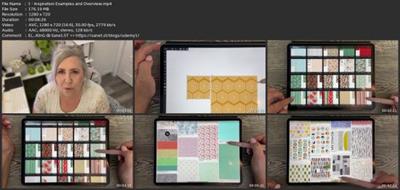
I have been excited to finish my full pattern collection. How about you? There is something just so satisfying about getting the job done! It has been a fun time to experiment with different ideas for producing the coordinates. I went kind of crazy, producing way more than I need. That's ok! They will come in handy. In fact, I may end up doing two collections with all the patterns.This class, Creating Coordinates for a Pattern Collection, will show how I developed very different sorts of patterns. I have created a well-rounded group of patterns and I can already imagine the end use. The purpose of designing the collection is to be able to offer the end user many different options. For example, a quilt-maker could have 6 - 10 different options for even the most intricate of quilt patterns. I used the same color palette throughout the three classes as well. Each coordinate contrasts well or matches beautifully, and I have gone to extremes. What I mean by that is I have large scale and small scale, geometric and soft, and light colors to dark colors. A well-rounded collection can and should be adaptable to many different end products.You will learn a few new things and many of the Affinity Designer skills you have already learned will be reinforced. Each time I do a pattern design class for Affinity Designer, new opportunities present themselves for teaching you advanced skills and efficiency strategies. And I try to always do things in a way that makes it interesting.In this class I'll walk you through:using your assets from the Asset Studio to make a new patterncreating a unique geometric patterncreating stripes using two completely contrasting techniquestips for creating compositions for a new iteration of the hero patternadjusting colors until satisfied with a color scheme and keeping it simple enough to edit laterHow a surface pattern designer works is the main focus of the class. Creating collections is key to being a surface pattern designer whose work is in demand. With these pattern design classes, I am creating a continuum of learning that, once complete, will give you the skills necessary to pursue this as one of your possible alternative income streams.Oh! And did I mention there's a surprise? You will have to watch the whole class to see what it is!The key concepts I will include:review of pattern design methodology specific to Affinity Designerhow decisions are made with placement of motifs and color choices to produce coordinates and blendersapproaches you can take moving forward with your surface pattern design careerThis class takes you into Affinity Designer for finishing up the surprise, but I have also included a Procreate version for those of you who are working strictly in that software. This workflow may be different for you if you use other software, but all the concepts are applicable for you. If you've used Procreate or Affinity Designer before, you will feel comfortable with all the steps.Intro to Creating Coordinates for a Pattern CollectionThis short intro will give you an overview of the class.Lesson 1: Inspiration, Examples and OverviewIn this lesson, I will show you my coordinates I have already created for this collection and a few more to boot! I will also talk about developing the patterns and we will look at inspiration and examples on Pinterest.Lesson 2: Creating Stripes with Two MethodsIn this lesson, I will break down the complete process of creating two types of stripes. The first one is your basic stripe which we build using the rectangle tool. We will build with a stroke which we draw using the pencil tool. I show you how easy it is to create a stripe using these two methods.Lesson 3: Adding Interest for a Unique StripeIn this lesson, I will show you an alternate stripe. The first one was very formal and this one is very fun and casual. We expand a stroke to create the curve which we fill with a bunch more stripes. This creates a ribbon-like stripe with a lot of character and interest.Lesson 4: Triangle Pattern and VariationsThis is the lesson in which I teach you about creating a triangular repeat pattern. The challenge is the fitting, of course! I also show you how to unite the borders of the triangles and re-coloring for interest. This is just one idea. There are many more to come!Lesson 5: Half Drop Floral Pattern CoordinateWhat I loved about this lesson is getting to use my asset gallery. This made the creation of a coordinate very easy. I take you through most of my steps including going back to my original and adding another asset to the asset studio.Lesson 6: Create A Less Detailed Floral CoordinateThere are so many ways to develop coordinates. In this lesson, I continue to use assets in my Asset Studio. This pattern is much less detailed and has very little color. I show you how I create it from start to finish.Lesson 7: Extra Lesson with a DownloadableI won't even mention what the surprise is for those of you who have made it this far. If you are reading this, it means you are ready for the next step. Enroll in the class to find out more!!!Lesson 8: Conclusion, Pep Talk, and Wrap UpWe will conclude everything in this lesson. I show you a series of mockups and a few sell sheets and some quick mock-ups with the pattern collection and we end with a chat about next steps.Concepts covered:Concepts covered include but are not limited to creating blenders and coordinates, creating stripes, the rectangle tool, the pencil tool, Procreate inking techniques, vectorizing a raster image, expanding a stroke, filling an expanded stroke with a simple pattern, creating color schemes, pattern arrangement, adjusting motifs, the path tool, the node too, the move tool, shapes, color swatches and importing colors, Affinity Designer Asset Studio, Affinity Designer Vector Persona, layering, Affinity Designer Transform Studio, Affinity Designer pattern design, Affinity Designer Color Studio, texture bitmap fills, and much more.You will get.1 hour and 13 minutes of direction from an instructor who has been in graphic design business and education for over 40 yearsknowledge of multiple ways to solve each design challengean outline which you can print and add to your course binderProject DescriptionStart by being sure your Asset Studio is fully loaded with motifs. Your challenge is to create three different patterns to complete a mini collection. Try your hand as using your assets initially, for a pattern or two. Try one with a variety of motifs, up to ten, and then try one with only two or three. Lastly, try producing a geometric pattern. It can be the triangles idea, or you can try any other geometric shape. The key is to make it a good contrast. Be sure to vary use of color but keep it to the color palette of your hero. I can't wait to see it all on the surprise from Lesson 7!
Overview
Section 1: Introduction
Lecture 1 Inspiration, Examples and Overview
Lecture 2 Creating Stripes with Two Methods
Lecture 3 Adding Interest for a Unique Stripe
Lecture 4 Triangle Pattern and Variations
Lecture 5 Half Drop Floral Pattern Coordinate
Lecture 6 Create A Less Detailed Floral Coordinate
Lecture 7 Extra Lesson with a Downloadable
Lecture 8 Conclusion, Pep Talk, and Wrap Up
iPad artists looking to create vector seamless repeat patterns in Affinity Designer
Download link
rapidgator.net:
Код:
https://rapidgator.net/file/4803b3f9aa71e28e4ca145fcfeb8b01b/teryv.Ad9.Coordinates.For.Pattern.Collection.In.Affinity.Designer.part1.rar.html
https://rapidgator.net/file/b6ebf160e9db284c9648203ba9bad485/teryv.Ad9.Coordinates.For.Pattern.Collection.In.Affinity.Designer.part2.rar.html
uploadgig.com:
Код:
https://uploadgig.com/file/download/79f885222837893C/teryv.Ad9.Coordinates.For.Pattern.Collection.In.Affinity.Designer.part1.rar
https://uploadgig.com/file/download/948764d7cD935e3C/teryv.Ad9.Coordinates.For.Pattern.Collection.In.Affinity.Designer.part2.rar
nitroflare.com:
Код:
https://nitroflare.com/view/AF6B931EDE52D6E/teryv.Ad9.Coordinates.For.Pattern.Collection.In.Affinity.Designer.part1.rar
https://nitroflare.com/view/3048135A6705E1D/teryv.Ad9.Coordinates.For.Pattern.Collection.In.Affinity.Designer.part2.rar
|
|
|
|
|
28.12.2022, 05:36
|
#79864
|
|
Местный
Регистрация: 04.10.2017
Сообщений: 107,495
Сказал(а) спасибо: 0
Поблагодарили 6 раз(а) в 6 сообщениях
|
Airbrush Shading In Procreate With Selections And Clip Masks

Last updated 12/2022
MP4 | Video: h264, 1280x720 | Audio: AAC, 44.1 KHz
Language: English | Size: 793.32 MB | Duration: 0h 39m
Learn to Create Dimension in Your Procreate Artwork
What you'll learn
step-by-step method for planning and executing an illustration
workflow for use of layers and other great features like clipping masks and quick selections
adding dimension using airbrushing techniques
methods for keeping the art fully editable for either adjustments or recoloring
Requirements
some Procreate experience or familiarity is an asset
Description
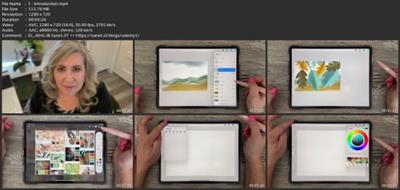
Sometimes I just want a fun and easy class, and that is exactly what this is! The skills are easy to pick up and the results are very dramatic while also being soft and pretty, if that makes sense. The whole class is in Procreate and I walk you through the entire process, starting with a sketch and finishing up with a lovely composition that has plenty of dimension. I have kept the subject matter simple so you can concentrate on the concepts.The main skills you will pick up or reinforce are the use of selections and methods to make creating selections as easy as possible. We will also use clipping masks in the class to help us keep everything neat and tidy!In this class I'll walk you through:· my step-by-step method for planning and executing an illustration· tips for creating compositions for a varied and appealing layout· my workflow for use of layers and other great features like clipping masks and quick selections· adding dimension using airbrushing techniques· adding details like a sun and birds· methods for keeping the art fully editable for either adjustments or recoloringIf you're an aspiring illustrator with a basic knowledge of Procreate, you'll be able to go through all the steps with no issues. This class will benefit anyone who wishes to reinforce selection methods, use of clipping masks and more, and methods to improve efficiency.The key concepts I will include:· making selections from drawn elements· working with clipping masks to add details to drawn elements· approaches you can take in your creative workThis is an ideal class for you, even if you are not sure what you will use the art for. I show you the use of the art on mock-ups, at the end, so you can get inspired. I guarantee you will create something super attractive, and it's so much fun, you will use these techniques again!Intro to Airbrushed Shading in Procreate using Selections and Clipping MasksThis short intro will give you an overview of the class.Lesson 1: Overview and Document Set UpIn this lesson, I will give an overview of the document set-up, breaking down each of the components for you to see. Next, we will be creating the color palette by using a photo we source on-line.Lesson 2: Draw Leaves and Start CompositionIn this lesson, I will break down the complete process of producing a quick sketch of leaves and then inking them individually. You will watch as I create a composition with these leaves. Once the leaves are arranged, we will also draw in the land masses.Lesson 3: Adding Dimension to Leaves Using SelectionsIn this lesson, I will explain a couple of different methods for adding the shading that will give us all the dimension. The first method is to make a freehand selection. The second method is to draw shapes to use for automatic selections. The merits of the second method are explained along the way. Both methods use clipping masks and that will be explained thoroughly.Lesson 4: Background and Other DetailsThis is the lesson in which I teach you about working on the background elements. We use selections again and make three different land masses that recede into the distance. Then we take a look at blending these and finally we will add some shading behind the leaves to make them really stand out.Lesson 5: Stems and Other DetailsIn this lesson, we start getting to the final stage of the artwork. I will be finalizing all the leaves with stems and such, and we will add a sun or moon and a few birds.Lesson 6: Conclusion, Mockup and Next StepsWe will conclude everything in this lesson. I show you a couple of quick mock-ups with the pattern and we end with a chat about next steps.Concepts covered:Concepts covered include but are not limited to Procreate layering, transparency, Procreate airbrushing techniques, Procreate canvas settings, watercolor brush settings, Procreate snapping and guides, sizing of documents and brushes, compositions with brush stamps, adding dimension with air brushes, procreate air brushes for adding other interesting details, workflow best practices, painting best practice, Procreate clipping masks, techniques with selections, and much more.You will get the bonus of.· 50 minutes of direction from an instructor who has been in graphic design business and education for over 40 years· knowledge of multiple ways to solve each design challenge· an outline with links to further research· a list of helpful online sites to further your education into surface pattern designProject DescriptionEnjoy the simple process of drawing the leaves as I have suggested, or use other shapes that will work well for this project. Choose a lovely color scheme and create the color palette like I suggest. Limiting your palette will keep your work cohesive. Once complete, try using it on a mock-up and post it here to share with your fellow classmates.
Overview
Section 1: Introduction
Lecture 1 Introduction
Lecture 2 Draw Leaves and Start Composition
Lecture 3 Adding Dimension to Leaves Using Selections
Lecture 4 Background and Other Details
Lecture 5 Stems and Other Details
Lecture 6 Conclusion, Mockup and Next Steps
Procreate users looking to learn more about clipping masks and other advanced techniques
Download link
rapidgator.net:
Код:
https://rapidgator.net/file/f2cb11cf4a7da245ac5c20d93aabce88/tcywq.Airbrush.Shading.In.Procreate.With.Selections.And.Clip.Masks.rar.html
uploadgig.com:
Код:
https://uploadgig.com/file/download/8B09d1cC73b14b71/tcywq.Airbrush.Shading.In.Procreate.With.Selections.And.Clip.Masks.rar
nitroflare.com:
Код:
https://nitroflare.com/view/A27B3BA6F09C8C7/tcywq.Airbrush.Shading.In.Procreate.With.Selections.And.Clip.Masks.rar
|
|
|
|
|
28.12.2022, 05:38
|
#79865
|
|
Местный
Регистрация: 04.10.2017
Сообщений: 107,495
Сказал(а) спасибо: 0
Поблагодарили 6 раз(а) в 6 сообщениях
|
Authentic Stitched Felt Appliqué Art In Procreate

Published 12/2022
MP4 | Video: h264, 1280x720 | Audio: AAC, 44.1 KHz
Language: English | Size: 1.21 GB | Duration: 0h 58m
20 Stitch and Texture Brushes Included
What you'll learn
Learn step-by-step method for making brushes
Learn to draw shapes and use draw assist
Learn methods for keeping the art fully editable for later adjustments and recoloring
Learn hand drawing funky lettering techniques
Requirements
No pre-requisite but experience with Procreate is an asset
Description
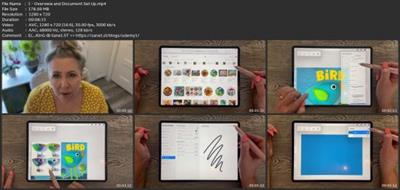
I am always looking for ideas for new classes and brush sets, and this week I was inspired by felt applique art I saw in a children's book. When you look closely and break it down, it translates well for a Procreate project. Why? There are many great concepts to explore: the use of texture, the use of dimension, details that can be reproduced as a brush and much more. I practised a few and felt ready to put this class, Authentic Stitched Felt Applique Art in Procreate, together.In this class I'll walk you through:my step-by-step method for making brushestips for creating compositions using brushes and texturesmy workflow for use of layers and other great features like clipping masksdrawing shapes and using draw assisthand drawing funky letteringmethods for keeping the art fully editable for later adjustments and recoloringIf you have a good basic knowledge of Procreate, you'll be able to go through all the steps, all the while learning or reinforcing this list of skills. This class is for anyone who wishes to up-level their skills and learn methods to improve efficiency.The key concepts I will include:review of my brush alterations and adjustmentsa look at using brushes to add depth and texturemy complete methodology for this type of document in ProcreateThis is a great class for you, even if you are not sure what you will use the pattern for. I take the time at the end to show you a bunch of mock ups to give you ideas! I even show you how mock ups work. Learning new Procreate workflows is always a plus. I guarantee you will create something appealing, and it's such a cute project, once you understand the basic set-up!Intro to Authentic Stitched Felt Applique Art in ProcreateThis short intro will give you an overview of the class. I will show you my artworks and what you will be creating in class.Lesson 1: Overview and Document Set UpIn this lesson, we will start by looking at a bunch of inspiration. I will show you the breakdown of my document. You will get an overview of the document set-up and we will create the first layer, the background.Lesson 2: Creating the Basic ShapesIn this lesson, we will be creating the basic shapes. I show you the basic structure of one of the groups in which we create the shadow and highlights. Then we will make a clipping mask to add the felt texture to all the layers we created. Keeping layers organized and labelled is critical when you will be using 70+ layers!Lesson 3: Adding in the Initial StitchingIn this lesson, I will explain the settings and sizing of the stitch brushes in relation to the look we are trying to achieve. I will show you some of the key techniques I use and explain every step of the way. I will also show you how to add more dimension to the stitching.Lesson 4: Adding Lettering to the LayoutWe add the lettering in this lesson, so I explain my process for doing that. I explain all the ins and out of adding the stitching. There are a few factors to take into account.Lesson 5: Flowers, Leaves and StemsIn this lesson, we start getting to the finishing touches of the final artwork. I will be finalizing all the leaves and that will include creating clipping masks and layer organizing. We are one step closer to finalizing our design now. By the end of the lesson only small details remain.Lesson 6: Brush Making Details and the Mock UpIn this lesson we will review the making a of a brush so you know how you can add to your sewing set. I will also show you how to use a mock up and add some background, either with color or with a resident pattern.Lesson 7: Conclusion, Mock Up and Next StepsWe will conclude everything in this lesson. I show you a couple of quick mock-ups with the pattern and we end with a chat about next steps.Concepts covered:Concepts covered include but are not limited to Procreate layouts, Procreate details with specialty stitch brushes, layering, Procreate brush stamps for button flowers, Procreate canvas settings, Procreate snapping and guides, the Brush Studio in Procreate, adjusting Procreate brushes, sizing of documents and brushes, compositions with brush stamps, adding texture with brushes, procreate brushes for adding other interesting details, workflow best practices, painting best practice, Procreate composites, techniques with paints and blending, mock ups, and much more.You will get .49 minutes of direction from an instructor who has been in graphic design business and education for over 40 yearsknowledge of multiple ways to solve each design challengean outline with links to further researcha list of helpful online sites to further your education into surface pattern designProject DescriptionFor the felt appliqué project, I would suggest you find a couple of really good reference photos. You can either bring them in as a canvas reference or just import into your document like I did. Then download and install the Procreate brushes provided to get started on your appliqué design. Start by creating the main shapes. Work through each of the lessons, applying the concepts as I teach them. Try to create at least one brush, or experiment with changing settings on the brushes provided. ith your fellow classmates.
Overview
Section 1: Introduction
Lecture 1 Overview and Document Set Up
Lecture 2 Creating the Basic Shapes
Lecture 3 Adding in the Initial Stitching
Lecture 4 Adding Lettering to the Layout
Lecture 5 Flowers, Leaves and Stems
Lecture 6 Brush Making Details and the Mock Up
Lecture 7 Conclusion, Mock Up and Next Steps
Anyone wanting to become more proficient in Procreate illustration techniques
Download link
rapidgator.net:
Код:
https://rapidgator.net/file/1c15c6120e372aec3575b7c9431f8098/bmtsg.Authentic.Stitched.Felt.Appliqu.Art.In.Procreate.part1.rar.html
https://rapidgator.net/file/2853be57522a494c7d7ccf32a1b48bde/bmtsg.Authentic.Stitched.Felt.Appliqu.Art.In.Procreate.part2.rar.html
uploadgig.com:
Код:
https://uploadgig.com/file/download/6bBB453F2dc26681/bmtsg.Authentic.Stitched.Felt.Appliqu.Art.In.Procreate.part1.rar
https://uploadgig.com/file/download/29C028d0F0ac77c9/bmtsg.Authentic.Stitched.Felt.Appliqu.Art.In.Procreate.part2.rar
nitroflare.com:
Код:
https://nitroflare.com/view/65C91AC9D852EE9/bmtsg.Authentic.Stitched.Felt.Appliqu.Art.In.Procreate.part1.rar
https://nitroflare.com/view/0659733EC19C8F1/bmtsg.Authentic.Stitched.Felt.Appliqu.Art.In.Procreate.part2.rar
|
|
|
|
|
28.12.2022, 05:39
|
#79866
|
|
Местный
Регистрация: 04.10.2017
Сообщений: 107,495
Сказал(а) спасибо: 0
Поблагодарили 6 раз(а) в 6 сообщениях
|
Autodesk Revit Architecture Bim Training

Last updated 12/2015
MP4 | Video: h264, 1920x1080 | Audio: AAC, 44.1 KHz
Language: English | Size: 3.41 GB | Duration: 3h 42m
A course based on the experience gained in more than ten years in the Autodesk Authorized Training Center I founded
What you'll learn
Design and build an architectural project from scratch in Autodesk Revit like professional!
Requirements
you will only need a pc with Autodesk Revit installed in order to follow the exercises.
Description
From zero to Autodesk professional! This course will cover everything you need to know about Revit with many easy and practical tutorials. Learn to design and build an architectural project from scratch in Autodesk Revit, if you are interested in automated drawing, design, architecture this is the right course for you!The course 'Autodesk Revit Bim training' is based on my personal experience as an Autodesk Authorized Instructor, it starts with a preliminary tutorial so that you can become familiar with the graphic interface of the program Autodesk Revit Architecture, then we will learn how to set up a project from scratch, establish structural grid lines and reference lines and start setting up structural columns.The next step will be installing walls, control their wall assembly and learn how to customize elements, you will learn how to use the curtain wall tool and how to create slabs and stairs.A whole tutorial is focused on roofs, how to build them and give the proper slope. Later you will learn how to use of the area command which will allow you to generate quickly and effectively area calculation for your project and how to generate schedules and area takeoffs.Modelling a terrain, a classical complex task with other software, such as AutoCAD, 3ds Max or Rhino is made very easy by Revit, you'll see!At the end of the course we will examine how to develop details to go with our construction document and you will learn how to create a parametric 3d component, the so-called "Revit families" Post Scriptum: I originally recorded the tutorials in Italian and then asked Alessandro, a friend of mine who lives in the States, to translate them in English, so don't be surprised when you'll hear a very manly voice speaking! Have fun! and learn well! Elisabetta Cenci
Overview
Section 1: Introduction to Revit User Interface
Lecture 1 Revit User Interface
Lecture 2 about teacher
Section 2: Reference lines
Lecture 3 Reference lines
Section 3: Wall assemblies
Lecture 4 Wall assemblies
Section 4: Curtain walls
Lecture 5 Curtain walls
Section 5: Slabs
Lecture 6 Slabs
Section 6: Roofs
Lecture 7 Roofs
Section 7: Columns and beams
Lecture 8 Columns and beams
Section 8: Stairs
Lecture 9 Stairs
Section 9: Ceilings
Lecture 10 Ceilings
Section 10: Areas and legends
Lecture 11 Areas and legends
Section 11: Schedules and room
Lecture 12 Schedules
Section 12: Parametric Tags
Lecture 13 Parametric Tags
Section 13: Terrains
Lecture 14 Terrains
Section 14: Phases
Lecture 15 Phases
Section 15: Details
Lecture 16 Details
Section 16: Parametric families
Lecture 17 Parametric families
Section 17: Title Blocks
Lecture 18 Title Blocks
Section 18: Sheets and printing with Revit
Lecture 19 Sheets and printing with Revit
If you are interested in automated drawing, design, architecture, this is the right course for you! Drawing time will be radically reduced!
Download link
rapidgator.net:
Код:
https://rapidgator.net/file/734050c5c8d55b2514413e97ed50e7eb/mmlbz.Autodesk.Revit.Architecture.Bim.Training.part1.rar.html
https://rapidgator.net/file/199d2b71129916ed2735db93c882cae6/mmlbz.Autodesk.Revit.Architecture.Bim.Training.part2.rar.html
https://rapidgator.net/file/55d6f7febd45a7dd685d4078d060da55/mmlbz.Autodesk.Revit.Architecture.Bim.Training.part3.rar.html
https://rapidgator.net/file/ae9141775673727f39fbdd8aa9cf13f8/mmlbz.Autodesk.Revit.Architecture.Bim.Training.part4.rar.html
uploadgig.com:
Код:
https://uploadgig.com/file/download/52f1ee8e83c6679d/mmlbz.Autodesk.Revit.Architecture.Bim.Training.part1.rar
https://uploadgig.com/file/download/1dCAe65904C89f1e/mmlbz.Autodesk.Revit.Architecture.Bim.Training.part2.rar
https://uploadgig.com/file/download/E250bf5cc0f13E25/mmlbz.Autodesk.Revit.Architecture.Bim.Training.part3.rar
https://uploadgig.com/file/download/9cd66d659d53964e/mmlbz.Autodesk.Revit.Architecture.Bim.Training.part4.rar
nitroflare.com:
Код:
https://nitroflare.com/view/025182A7FE8D474/mmlbz.Autodesk.Revit.Architecture.Bim.Training.part1.rar
https://nitroflare.com/view/F8B4CDD910714FD/mmlbz.Autodesk.Revit.Architecture.Bim.Training.part2.rar
https://nitroflare.com/view/FFAE8F419475406/mmlbz.Autodesk.Revit.Architecture.Bim.Training.part3.rar
https://nitroflare.com/view/65A00672C8D5479/mmlbz.Autodesk.Revit.Architecture.Bim.Training.part4.rar
|
|
|
|
|
28.12.2022, 05:40
|
#79867
|
|
Местный
Регистрация: 04.10.2017
Сообщений: 107,495
Сказал(а) спасибо: 0
Поблагодарили 6 раз(а) в 6 сообщениях
|
Basic Of Heat And Transfer (Ht) Vs Engineering Thermodynamic

Published 12/2022
MP4 | Video: h264, 1280x720 | Audio: AAC, 44.1 KHz
Language: English | Size: 623.58 MB | Duration: 1h 19m
The basic difference between HT and ET taught in a clear, practical way so that learner can understand it.
What you'll learn
To classify the heat transfer problems and to apply the principles of steady state one dimensional heat transfer
To understand the practical application of thermodynamics and heat transfer
To understand governing law of heat transfer.
Governing question used for occurring heat transfer
Requirements
Basic knowledge of physics
Description
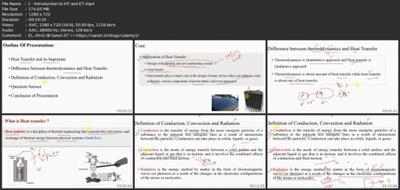
The study of energy is a part of thermodynamics. How do we obtain the energy we require to run our houses and travel? What is the mechanism of devices like engines, power plants, and refrigerators? As well as for all general applications, many heat transmission mechanisms have been used. For so, it is crucial to have a fundamental understanding of HT as well as the key distinction between ET and heat and mass transfer.For many different kinds of engineers, this course is crucial. Anyone who is interested in learning about the mode of heat transfer and how HMT differs from thermodynamics can take the class, I have created. All college students who are now taking Thermodynamics or who want to take HT in the future will find this course to be of great assistance. But this is also wonderful for anyone who wants to learn more about energy, a subject that is highly relevant right now! I avoid too convoluted theory and provide you with both the HOW and the WHY. Also at the end of this course i have added simple question for better understanding of this course outcome. With this very much best of luck for your new beginning of learning. And wish you best of luck !!
Overview
Section 1: basic difference between HT and ET
Lecture 1 Introduction to HT and ET
Lecture 2 Heat transfer mode - Conduction
Lecture 3 Heat Transfer Mode- Convection
Lecture 4 Example_1
Lecture 5 Example_2
All students/learner from different Engineering streams,Especially Engineering students wanting to get a head start on an upcoming engineering study
Download link
rapidgator.net:
Код:
https://rapidgator.net/file/e6b5a860074abe75b1dd62d81baa6d65/cdjsj.Basic.Of.Heat.And.Transfer.Ht.Vs.Engineering.Thermodynamic.rar.html
uploadgig.com:
Код:
https://uploadgig.com/file/download/a72ef00B303F4907/cdjsj.Basic.Of.Heat.And.Transfer.Ht.Vs.Engineering.Thermodynamic.rar
nitroflare.com:
Код:
https://nitroflare.com/view/70D4FDE5F037D53/cdjsj.Basic.Of.Heat.And.Transfer.Ht.Vs.Engineering.Thermodynamic.rar
|
|
|
|
|
28.12.2022, 05:42
|
#79868
|
|
Местный
Регистрация: 04.10.2017
Сообщений: 107,495
Сказал(а) спасибо: 0
Поблагодарили 6 раз(а) в 6 сообщениях
|
Concepts Of Cissp - Domain 2

Published 12/2022
MP4 | Video: h264, 1280x720 | Audio: AAC, 44.1 KHz
Language: English | Size: 1.78 GB | Duration: 1h 47m
The objective of this course series "Concepts of CISSP" is to cover CISSP domains in the most effective way possible.
What you'll learn
Understand domain 2 "Asset Security" of CISSP
Get in depth practical insight into all topics, key definitions and concepts
Able to memorise key points and get prepared for CISSP exam
Able to get ready for Cybersecurity interviews
Requirements
Basic IT background
Description
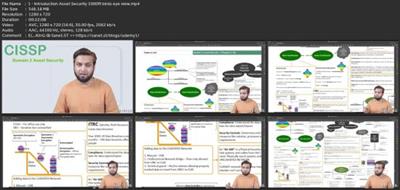
Do you feel CISSP certification is difficult?This course will make CISSP certification fun and easy. This module of "Concepts of CISSP" series will cover domain2. We will be releasing separate domains as separate modules.Welcome to CISSP. CISSP is one of the most reputable courses in the world of information security. The CISSP covers the fundamental elements of the entire cybersecurity field - from security and risk management to communication and network security to security testing and operations. The CISSP is designed for security professionals who have spent a few years in the industry, are currently in an information security position, and want to study cybersecurity leadership and operations.We will cover CISSP syllabus here and will focus on topics to explore core concepts, looking at the wider landscape and see tips and tricks for exams questions.I will be presenting drawings and whiteboard sessions to better engage with you and make the entire journey fun. The main goal of my course is to make the material as vivid as possible.Please note that the CISSP*exam outline documented on CISSP*website may not appear exactly same in my video discussions. The reason is because some of the topics are already discussed in the videos and we have overlapping situations. Please comment on if there is something missing or need more explanations. I will be happy to improvise by adding new content to the module.I'm hoping you'll find this training useful and enjoyable. If you happen to have any questions and further suggestions, feel free to reach out.
Overview
Section 1: Introduction
Lecture 1 Introduction - Asset Security 1000ft bird's eye view
Section 2: Asset Security | About NIST 800-88 Rev. 1
Lecture 2 Asset Security | About NIST 800-88 Rev. 1
Section 3: Data Protection Methods
Lecture 3 Data Protection Methods
Section 4: PII and Data Protection Methods
Lecture 4 PII and Data Protection
Section 5: Data Owners, Scoping and Tailoring
Lecture 5 Data Owners, Scoping and Tailoring
Section 6: Quick Recap and few Important Points
Lecture 6 Quick Recap and few Important Points
IT professionals, Security professionals, Computer science students
Download link
rapidgator.net:
Код:
https://rapidgator.net/file/34ac8ab2f73e73fdfd6591f4acab6e34/nqucb.Concepts.Of.Cissp..Domain.2.part1.rar.html
https://rapidgator.net/file/c4ad1a88ae6e5dde6e8c64e1e608fbdb/nqucb.Concepts.Of.Cissp..Domain.2.part2.rar.html
uploadgig.com:
Код:
https://uploadgig.com/file/download/7673d509C75F6675/nqucb.Concepts.Of.Cissp..Domain.2.part1.rar
https://uploadgig.com/file/download/4f4Bc864B73bc68e/nqucb.Concepts.Of.Cissp..Domain.2.part2.rar
nitroflare.com:
Код:
https://nitroflare.com/view/4E12602302E09D6/nqucb.Concepts.Of.Cissp..Domain.2.part1.rar
https://nitroflare.com/view/A6FB5E1586649DC/nqucb.Concepts.Of.Cissp..Domain.2.part2.rar
|
|
|
|
|
28.12.2022, 05:43
|
#79869
|
|
Местный
Регистрация: 04.10.2017
Сообщений: 107,495
Сказал(а) спасибо: 0
Поблагодарили 6 раз(а) в 6 сообщениях
|
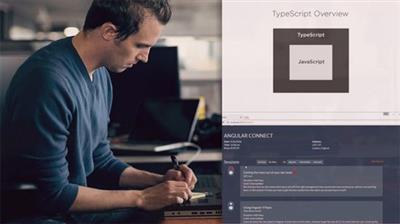
Constructing a User Interface with Angular
David Mann | Duration: 4:35 h | Video: H264 1280x720 | Audio: AAC 44,1 kHz 2ch | 727 MB | Language: English
The user interface is the single most important part of your application, because to users, it IS the application. Nothing else matters. In this course, you learn how to deliver an easy, effective, efficient, and maintainable UI using Angular.
At the core of any Angular project is how the user interacts with the application. In this course, Constructing a User Interface with Angular, you'll learn how to deliver an easy, effective, efficient, and maintainable UI. First, you'll learn the different elements involved in an Angular UI. Next, you'll explore how to structure and develop an interface using those elements. Finally, you'll discover how to do everything you need while maintaining performance and a loosely coupled architecture. When you're finished with this course, you'll have the knowledge and skills to help you as you move forward to Angular Awesomeness!
rapidgator.net:
Код:
https://rapidgator.net/file/10f499b326d726edac5d1b2a6cafba76/tzewz.Constructing.a.User.Interface.with.Angular.rar.html
uploadgig.com:
Код:
https://uploadgig.com/file/download/b35da8482Fa60809/tzewz.Constructing.a.User.Interface.with.Angular.rar
nitroflare.com:
Код:
https://nitroflare.com/view/1F02E89776E1162/tzewz.Constructing.a.User.Interface.with.Angular.rar
|
|
|
|
|
28.12.2022, 05:45
|
#79870
|
|
Местный
Регистрация: 04.10.2017
Сообщений: 107,495
Сказал(а) спасибо: 0
Поблагодарили 6 раз(а) в 6 сообщениях
|
Coordination Kali

Published 12/2022
MP4 | Video: h264, 1280x720 | Audio: AAC, 44.1 KHz
Language: English | Size: 1.55 GB | Duration: 1h 14m
Improve Coordination, awareness, reaction time, cognitive function and so much more. All while learning Martial Arts.
Improve Coordination, awareness, reaction time, cognitive function and so much more. All while learning Martial Arts.
What you'll learn
Step by step tutorials introducing you to the art of Kali.
Improves coordination, awareness, timing, cognitive functions, and so much more.
Great activity for friends, family or by yourself.
Taught by a Professional Martial Arts instructor with 10+ years experience teaching in person.
Requirements
A pair of Kali sticks. Great for any experience level.
Description
Coordination Kali*will teach Lacoste Inosanto Kali utilizing the Drill Format.Benefits include, but are not limited to- Coordination- Reflexes- Cognitive Function - Basic understanding of Filipino Martial Arts (FMA)*and JKD(*Jeet Kune Do/Jun Fan Gung fu)- Great activity with friends, family or by yourself- Blends well into any Art. Eventually the student will come to understand the different between a technique and a concept. The basic course offers a non-combative form of Kali/Eskrima designed to build on the practitioner's coordination and build individual confidence. This is an excellent course for the elderly & individuals with limited physical abilities. There is significant data to show Kali/Eskrima coordination drills have benefited individuals suffering from early onset dementia.Wing Chun and Jeet Kun Do are closely related in that Bruce Lee developed the Jeet Kun Do concept based on his original learning in the Wing Chun system. The Collective Martial Arts will be offering courses that teach the concept in lieu of a systematic or regimented martial arts style. This is to allow individual students to learn and adapt what works best for them as they progress through the system. As with the Kali/Eskrima coordination course, the Wing Chun & JKD courses will be offered on-line as a solo training program and in person training at the center.
Overview
Section 1: The Core Basics of Coordination Kali
Lecture 1 Footwork
Lecture 2 Lacoste Inosanto 1 - 17
Lecture 3 Box Drill
Lecture 4 Abanico Witik - Box Drill Method
Lecture 5 Closed Chamber Drill Part One
Lecture 6 Closed Chamber Basics Part Two
Section 2: Putting it all together + Sumbrada State of Mind
Lecture 7 Basic Sumbrada Breakdown
Lecture 8 Flow Drill # 1
Lecture 9 Single Stick Hubud Lubud
Lecture 10 Sumbrada Chain # 1
Lecture 11 Chains # 2 - # 5
Section 3: Drills4Skills
Lecture 12 Lockflow 1 - 12 and introduction to Salutes and Elbow Destructions
Lecture 13 Closed Chamber 3 Count Permutations
Lecture 14 Basic Footwork - Revisited
Lecture 15 Staff Flourish Basics
Martial Arts Enthusiast.
rapidgator.net:
Код:
https://rapidgator.net/file/2b57f6e37fd2e82bb88b77015ff237f4/bywzu.Coordination.Kali.part1.rar.html
https://rapidgator.net/file/3111dc891333e5bcbc001e6679dbb8a2/bywzu.Coordination.Kali.part2.rar.html
uploadgig.com:
Код:
https://uploadgig.com/file/download/5B524EA157387b36/bywzu.Coordination.Kali.part1.rar
https://uploadgig.com/file/download/32d9822A25601f3a/bywzu.Coordination.Kali.part2.rar
nitroflare.com:
Код:
https://nitroflare.com/view/76036C2942ABB9E/bywzu.Coordination.Kali.part1.rar
https://nitroflare.com/view/3FF0F5570D488F0/bywzu.Coordination.Kali.part2.rar
|
|
|
|
|
28.12.2022, 05:46
|
#79871
|
|
Местный
Регистрация: 04.10.2017
Сообщений: 107,495
Сказал(а) спасибо: 0
Поблагодарили 6 раз(а) в 6 сообщениях
|
Easy Pattern Design With The Blob Brush In Illustrator
Last updated 1/2021
MP4 | Video: h264, 1280x720 | Audio: AAC, 44.1 KHz
Language: English | Size: 836.01 MB | Duration: 1h 10m
Techniques for Adding Depth and Interest to Pattern
What you'll learn
Easy Techniques for Drawing Motifs Using the Blob Brush
Quick and Simple Drawing in Illustrator using the Blob Brush and the Eraser Tool
Students will learn how to create coordinate patterns quickly
Students will learn fundamentals of designing collections
Requirements
Basic Illustrator knowledge is an asset
Students will learn all fundamental skills necessary to complete the class
Description
Hi, guys! I know, I know: another Illustrator Brush class. But wait! Don't go! I teach so many of these classes because everyone wants to know how to use the brush tool. But this is something completely new here: a whole class built around the use of the Blob Brush! In this new course, Easy Blob Brush and Shapebuilder Ideas for Scandinavian Pattern Design, I will help you to create stunning artwork in short-order, in that oh-so-desirable naïve Scandinavian style. That is why I created this class: for you guys who want to learn how to use the blob brush in Illustrator, and I am throwing in an in-depth look at the Shapebuilder tool as well. This covers how to combine, extract, and trim shapes all with this one powerful tool! Your Illustrator workflow will never be the same. Wave goodbye to the various and often confusing pathfinder functions (we will do a comparison so you can see for yourself!). In this one class, you will find all the practical skills required to use the Blob Brush tool efficiently and effortlessly. The two tools work hand-in-hand! In so doing, I am also teaching you techniques for adding depth and interest to patterns created in this style!I'll take you through creating a "Scandi-Floral" themed pattern collection for your portfolio. I'll be showing you many more advanced Adobe Illustrator skills along the way, but you can definitely be a beginner when it comes to learning these two tools. If you are like me, you're always learning new pattern design skills and you want to take it one step further. Are you looking for ways to scale-up your pattern and coordinate production, while learning how you can make your motifs and patterns more simply and effortlessly?Development of quick techniques with the blob brush for pattern design in Illustrator is the focus of this course, with the goal of helping you increase your proficiency with Illustrator techniques you may never have considered. You will craft a refreshing pattern which can be finished in a variety of ways! In this course, you will learn every step! And the techniques you pick up can be used for so much more than florals! Think of your favourite illustrations to draw and imagine using these methods and techniques on them! What you learn here covers many fundamental principles in the general workflow of many surface pattern designers and graphic illustrators.And of course, the class would not be complete without devising and constructing a series of coordinate patterns with simple and quick techniques. It is SO. MUCH. FUN!You may have taken courses on pattern design before, but it is guaranteed that there are new methods and strategies to be learned each day. There's loads to be learned! And you will get more than just facts and knowledge: you can say bye-bye to all the frustrations and disappointment you get when watching tutorials that get you nowhere. If you've taken other Deloresart classes, this is just an essential evolution in your artistic development. Your repeat pattern can be used to sell with companies like Spoonflower or Print on Demand sites to design your own wallpaper, fabric or gift wrap, or to create custom products. I will show you my finished fabrics on a full kids room mockup and on baby clothes!As far as prerequisite skills, I would recommend some knowledge of Illustrator with the goal of wanting to learn additional techniques. In class, we'll talk about both design and technical aspects of creating a pattern. I will demonstrate them at a reasonable pace so that it will be easy to follow along. This course is for all levels; I recommend being acquainted with Illustrator to a certain degree. I suggest Illustrator for this class, as that is what is being featured here, but any other vector software is suitable, so long as it has the same functionality.This course has a bounty of things you may never have considered! You can be applying this practical knowledge in your design practice directly. Conceiving and executing a pattern can be done relatively quickly with this small investment of your time.The key concepts I will include:• Creating motifs using the blob brush, shapebuilder, the eraser tool and Pathfinder• An overview of what is trending in Scandinavian pattern design now• Many other considerations to do with designing repeating patterns efficiently• Approaches you can take in your creative work moving forward• Designing pattern layouts in pleasing arrangements• Designing a series of coordinates• Working with the re-colour toolThis is a relevant course for you to take no matter what the end purpose for the artwork you create. If you don't want to spend a whole lifetime figuring this tool out, let's dive in, so you can be benefitting from your knowledge now in your art practice! Start now and you can be done watching in just over an hour! Then you could be starting to plan your own future project today!
Overview
Section 1: Introduction
Lecture 1 Overview, Inspiration and Examples
Lecture 2 Getting Started with the Blob Brush
Lecture 3 Shapebuilder and Transparency Use in Motif-Making
Lecture 4 Combining and Subtracting with the Shapebuilder
Lecture 5 Additional Motif Building Techniques
Lecture 6 Adding a White Release Around the Motifs
Lecture 7 Quick Coordinate Ideas to Fill Out the Collection
Surface Pattern Designers, web developers, textile designers, artists, graphic designers,Anyone wanting to learn easy brush techniques in Adobe Illustrator,Anyone who want to learn easier ways to manage the pattern design workflow
Download link
rapidgator.net:
Код:
https://rapidgator.net/file/b3f7a50a14abd896317e827af182c128/wlphi.Easy.Pattern.Design.With.The.Blob.Brush.In.Illustrator.rar.html
uploadgig.com:
Код:
https://uploadgig.com/file/download/1b52510e807116cD/wlphi.Easy.Pattern.Design.With.The.Blob.Brush.In.Illustrator.rar
nitroflare.com:
Код:
https://nitroflare.com/view/51198601DD23566/wlphi.Easy.Pattern.Design.With.The.Blob.Brush.In.Illustrator.rar
|
|
|
|
|
28.12.2022, 05:48
|
#79872
|
|
Местный
Регистрация: 04.10.2017
Сообщений: 107,495
Сказал(а) спасибо: 0
Поблагодарили 6 раз(а) в 6 сообщениях
|
Easy Print-On-Demand For Artists With Adobe Design To Print
Last updated 8/2020
MP4 | Video: h264, 1280x720 | Audio: AAC, 44.1 KHz
Language: English | Size: 779.21 MB | Duration: 0h 56m
The Complete Setup & Workflow to Prepare Art and Publish Your First Product
What you'll learn
The complete setup and workflow to prepare art and publish your first product
Use the easy design to print extension from Adobe
How to make money on selling with POD sites
How to do basic Adobe Photoshop functions
Requirements
Photoshop experience is an asset
No experience with the DTP software
Description
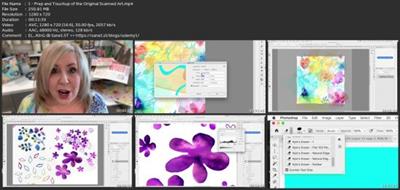
Hey there! Have you been trying to make ends meet with your art? Are you a maker, tired of dealing with the hassle of selling directly to public? Do you want to get out of the rat-race and create art you are passionate about? Are you worried about how to make a sustainable living? I'd like to suggest you consider adding POD sales as an alternate income source. My new course, Print-on-Demand for Artists - The Complete Setup & Workflow to Prepare Art and Publish Your First Product will help you do just that! Coined as "passive income", this can be a wonderful way of earning a regular income from work you have already done, or would rather be doing. Naturally, to make it a success of it, you will have to put plenty of effort in, especially at the beginning! It may seem like a daunting task, and the income won't happen over night, but I have a way to make it easier than ever! We will be using the new Adobe Extension, Design to Print."The Adobe Design to Print Extension is a new tool that enables designers to create artwork for printing on a multitude of actual products. available for free download on Adobe Exchange. A new palette enables the artist to select a "blank" product from a catalog (e.g., an article of clothing), and to preview how it will look when their design is printed on it. Familiar Photoshop tools, like placing images, brush strokes, and effects can be used to easily create a beautiful design while simultaneously viewing a visualization of its appearance when printed on the finished product. When ready, the design can be easily published!" - AdobeThis Design to Print Extension makes it much more convenient to keep up with listing your POD products because it is done right from within Photoshop. It's great to be able to earn regular money while you sleep, when you're on a holiday, or you are working on passion projects. The effort is all at the beginning, and the income arrives with just a little ongoing effort. This class is great for both established artists and those just starting out. In this course, Print-on-Demand for Artists, I'm sharing everything I've learned about using the extension. Design to Print is fully compatible with Zazzle, and everything can be done from within Photoshop. So, there is no need to switch back and forth between Photoshop and your browser. Once you post your product, it is fully available on the online marketplace. Additional print-on-demand services will offer compatibility with Design to Print in the future, so this is a great time to jump on board! You will be surprised how easy it is!In this class I will show you how you, as an artist, can add a new revenue stream from Print on Demand. I will share my personal experience, discuss the advantages and disadvantages and go into detail about preparing your art. We will be taking raw, watercolor painted motifs, eliminating the background, adjusting exposure levels and isolating and re-arranging the elements into a usable shower curtain (extra-large) layout. The beauty of creating the largest layout file is that it can be adapted infinitely for all the other shapes, proportions and sizes of POD products.As designers, we must channel our creative energies towards making a living. Ultimately, we want viewers (consumers) to be unconsciously persuaded into buying a product we create featuring our art. Many of us also create art for the simple satisfaction of bringing beauty into the world. And there is nothing quite as exciting as seeing our artwork in print, especially if it is on a physical object made purely for the enjoyment of the viewer. That is my motivation for bringing you this new course, Print-on-Demand for Artists. The Complete Setup & Workflow to Prepare Art and Publish Your First Product.As far as prerequisite skills, I would recommend some knowledge of Photoshop with the goal of wanting to learn additional techniques. In class, we'll talk about both design and technical aspects of creating compatible image files. I will demonstrate them at a reasonable pace so that it will be easy to follow along. This course is for all levels; I recommend being acquainted with Photoshop somewhat, and, also knowing the basic principles of creating images, but most steps are explained very thoroughly. I suggest pausing and repeating sections and possibly even slowing the speed in your browser when trying to work through any difficult parts. Adobe Photoshop is required for this class.The key concepts I will include:review of the complete Adobe Design to Print Extensionmethods to edit and deal with specific issues like cropping and other file considerationscreating a full layout with a DTP downloaded templateisolating motifs after touching up and eliminating backgroundsorganizational considerations like spreadsheets and master filesgood examples, reference and inspiration for reinforcing the goalThis course is packed with choice cuts of information for you no matter where you are in your career. Let's have you creating beautiful products this week, with this class. You can be benefitting from this practical knowledge in your design practice! Having products with your beautiful artwork is absolutely do-able with this small investment of time. Let's dig in!IntroIn this lesson, I will explain the goals for the class and I will share examples of my work. We will discuss the main techniques we will be using in this class.Lesson 1: Prep and Touchup of the Original Scanned ArtIn this lesson, we will go through the initial steps of preparing the watercolor art. We will eliminate the white background and adjust levels. We are preparing to separate items into individual layers. I will show you how to change the orientation of the document to make erasing and rubber stamping easier.Lesson 2: Separating Elements for the CompositionFor this lesson, we will go through the process of separating each element and roughly moving these elements into approximate positions. I show you levels adjustments on a much lighter motif and explain settings on the magic wand selection tool. We drag our separated elements onto the template document.Lesson 3: First Steps in Laying Out the CompositionMoving the elements around, we will finesse the layout. I will explain the use of the warp and puppet warp tools and will show you how to manipulate the elements further. I demonstrate ways to change duplicate motifs so copy is not apparent. I also explain design analysis of current shower curtain trends on the market to help you come up with ideasLesson 4: Fine Tuning the Motif Position and CompositionWe continue using the same techniques to perfect our layout and many considerations are explained. We will get close to the finished layout at this point. During the lesson, we use the warp and the puppet warp, as well as hue and saturation, to help add variety to copied motifs. I explain how to work with the layers. I also give you pointers on making more processing power available for the document in Photoshop.Lesson 5: Final Layout and PublishingHere's the part you have been waiting for: publishing! I will show you how the Design-to-Print extension works. Then we will be re-directed to the Zazzle Site where I will walk you through the listing.Lesson 6: A Final Look and Course Wrap-UpFor this lesson, I will introduce you to Adobe Exchange. We will discuss next steps and wrap-up. Thanks so much for being here! Hope to see you in many other classes!Concepts covered:Concepts covered include but are not limited to watercolor art, Photoshop image touch-up, Photoshop filters, keyboard shortcut reinforcement, erasing, Kyle's natural edge eraser, rubber stamping, document orientation, the Design-to-Print extension, creating layouts, shower curtain layout on Zazzle, levels control in Photoshop, magic wand selection tool, puppet warp, warp tool, moving, resizing, transform, the Zazzle marketplace, print-on-demand for artists, RedBubble, Society6 and much more!You will get.1 hour of direction from an instructor who has been in the graphic design business and education game for over 40 yearsawareness of multiple approaches to resolve each design challengehandouts explaining key conceptsa list of helpful online sites to further your education
Overview
Section 1: Introduction
Lecture 1 Prep and Touchup of the Original Scanned Art
Lecture 2 Separating Elements for the Composition
Lecture 3 First Steps in Laying Out the Composition
Lecture 4 Fine Tuning the Motif Position and Composition
Lecture 5 Final Layout and Publishing
Lecture 6 Final Look and Course Wrap-Up
Graphic designers and surface pattern designers looking for passive income streams,Artists looking to break into POD sales,Artists looking to learn faster and more efficient workflows for uploading to Zazzle website
Download link
rapidgator.net:
Код:
https://rapidgator.net/file/fc3256f330ea3658d69c13d60fd965e2/xxtqh.Easy.PrintOnDemand.For.Artists.With.Adobe.Design.To.Print.rar.html
uploadgig.com:
Код:
https://uploadgig.com/file/download/F255789caddbf384/xxtqh.Easy.PrintOnDemand.For.Artists.With.Adobe.Design.To.Print.rar
nitroflare.com:
Код:
https://nitroflare.com/view/2FCD643BCE160BD/xxtqh.Easy.PrintOnDemand.For.Artists.With.Adobe.Design.To.Print.rar
|
|
|
|
|
28.12.2022, 05:49
|
#79873
|
|
Местный
Регистрация: 04.10.2017
Сообщений: 107,495
Сказал(а) спасибо: 0
Поблагодарили 6 раз(а) в 6 сообщениях
|
Flip-Flop Techniques For Intricate Reflected Pattern Design

Last updated 12/2020
MP4 | Video: h264, 1280x720 | Audio: AAC, 44.1 KHz
Language: English | Size: 588.40 MB | Duration: 0h 46m
Use the Appearance Panel to See Duplicates or Reflections in a Live Way
What you'll learn
How to Use Illustrator Transformations to make Pattern Design Easier
Learn how to show your reflections and repeats in a live format
How to create and ogee design in Illustrator
How to make changes to color schemes in Illustrator
Requirements
Basic Illustrator knowledge is an asset
Knowledge of the basics of designing repeat patterns
Description
You know how I love the Appearance Panel and the power it gives me. I could not resist the urge to bring you another class to teach you a new pattern repeat I like to call the Flip Flop! In this class, I will show you that Illustrator has plenty of tools, panels, and commands to make our work much easier. You will learn a bunch of new skills and reinforce many you have learned, and they include brushes, repeat pattern design, the use of the Appearance Panel, Effects, and, of course, transformation.The Transform Effect in Adobe Illustrator lets you move, scale, flip, rotate and repeat the appearance of one or more selected objects, and all of this is editable in the Appearance Panel. The Transform Effect is a dynamic effect whose main result is to create patterns of content that can be easily manipulated, allowing you to make adjustments to the original object or group of objects. This is incredibly powerful, especially when combined with a clipping mask. I go into an even more detailed explanation of this than in the two previous classes I have taught on the subject, Secrets of Live Transformation Mandalas and Delicious Scallops. Using transformation(s), you can create patterns with paths, brush strokes and shapes, flip them, mirror them, move them, all of which I will explain in this class. Then you can edit the whole pattern by making adjustments to the original and changing settings in the Appearance Panel. You'll be surprised by the power of this new and indispensable skillset!Knowing transformation is knowing a lot - it gives you power you may have never even considered. In this class, Flip Flop Techniques for Intricate Pattern Design Using Live Transformations, you will learn the amazing power of the Transformation Effect in Illustrator by producing a template. This template can be saved and used over and over to produce repeat patterns, valuable in pattern design and illustration. I will show you by creating three different pattern types including a grid, a half-drop and an s-curve. You will have a gorgeous pattern (or two, or three) by the time you are done! We will be using reflect and rotate effects, but what you learn can easily be transferred to other functions.These skills will help you produce a gorgeous motif, or two, or three! We will be using reflect and rotate effects, but what you learn can easily be transferred to other functions. There are three related courses to explore where you see the motifs we create being even further developed:Flip Flop Techniques for Intricate Pattern Design Using Live TransformationsS-Curve, Ogee and Quatrefoil Exploration Using Your Live Transformation Template, andEnriched and Alluring Diversity for Classic Repeat PatternsTake all three for the complete continuum. The last one features Moroccan trellis patterns. It is the perfect addition! Prepare to be amazed! Get started now and you could have a finished pattern and a template by the end of the class. This is a relevant course for you to take no matter what your purpose for the artwork you create. Let's get at it, so you can spend the rest of the week creating some great designs.The key concepts I will include:Setting up a template for the initial flip-flop patternUsing brushes (and creating them) to produce a pattern in a hurrySetting up a clipping mask to give you even more creative freedomAdjustments you can make in the Appearance Panel to create the different configurationsPlenty of inspiration and places to look for moreIntro:This short intro will give you an overview of the class. We will be looking at the traditional ogee pattern and creating three versions including a grid, a half-drop and an s-curve.Lesson 1: Creating the Live Transformation TemplateIn this lesson, we will create the live transformation template using the appearance panel and layers for the flip flop repeat and reflection. You will even see me make a mistake and correct it at the end.Lesson 2: Creating a Set of Simple BrushesIn this lesson, I will demonstrate the creation of the simple brushes we need to compose the final pattern. I show you simple controls and how to create a stroke that can have color applied to it.Lesson 3: Fleshing Out the Complete DesignThis lesson will show you the use of the brushes to create the heart motifs and all the lines necessary for fleshing out the pattern. I will explain and demonstrate the use of the Blend Tool to create the radiating lines and explain some tips and tricks for color blending.Lesson 4: How to Create and Use the Clipping MaskThis lesson is about creating the clipping mask and many pointers for its use. We continue working with the blend tool as we try to perfect our pattern tile and prepare it for final output.Lesson 5: Creating the Final Pattern SwatchWe will extract the pattern swatch in this file and I will explain many other considerations.Lesson 6: Half Drop and S Curve Repeats and the AlT FileI show you the half-drop and s-curve examples in this lesson. I give you plenty of advice along the way! I will also explain how to save the template files.OutroWe will conclude everything in this lesson with a chat about next steps.Concepts covered:Concepts covered include but are not limited to the and live transformations, appearance palette, Illustrator templates, transform effects, clipping masks, half-drop ogee, grid ogee, s-curve ogee, rotation and reflection effects, mockups, simplify command, expanding shapes and lines, adding points, subtracting points, making Illustrator brushes, importing brush libraries, and AIT templates in illustrator.You will get the bonus of.around an hour of direction from an instructor who has been in the graphic design business and education for over 40 yearsknowledge of multiple ways to solve each design challengehandouts explaining key conceptsa list of helpful online sites to further your education into creating on-demand wall art.
Overview
Section 1: Introduction
Lecture 1 Introduction
Lecture 2 Lesson 2 Creating Simple Brushes
Lecture 3 Lesson 3 Fleshing Out the Complete Design
Lecture 4 Lesson 4
Lecture 5 Lesson 5
Lecture 6 Lesson 6
Lecture 7 Conclusion and Closing Thoughts
Surface pattern designers, textile designers, artists, graphic designers, artists, pattern designers,Pattern designers looking to create ogee patterns and other reflected patterns
Download link
rapidgator.net:
Код:
https://rapidgator.net/file/3e300ad02e89d9b394967c513bdeda60/avaui.FlipFlop.Techniques.For.Intricate.Reflected.Pattern.Design.rar.html
uploadgig.com:
Код:
https://uploadgig.com/file/download/50c01f88fB206dbD/avaui.FlipFlop.Techniques.For.Intricate.Reflected.Pattern.Design.rar
nitroflare.com:
Код:
https://nitroflare.com/view/662A8FE80DC0DD4/avaui.FlipFlop.Techniques.For.Intricate.Reflected.Pattern.Design.rar
|
|
|
|
|
28.12.2022, 05:51
|
#79874
|
|
Местный
Регистрация: 04.10.2017
Сообщений: 107,495
Сказал(а) спасибо: 0
Поблагодарили 6 раз(а) в 6 сообщениях
|
Gingham, Checkers And Buffalo Plaid Repeats In Procreate
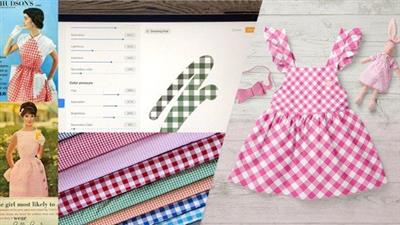
Published 12/2022
MP4 | Video: h264, 1280x720 | Audio: AAC, 44.1 KHz
Language: English | Size: 646.03 MB | Duration: 0h 33m
The Quick and Easy Method
What you'll learn
Learn the step-by-step method for making seamless patterns in Procreate
Learn about adjusting patterns and making them into pattern brushes
Learn about fully seamless pattern creation for brush making
Learn methods for adding color and variety to brushes
Requirements
Procreate experience is an asset but not required
Description
I have taught you how to make seamless repeat patterns in Procreate before, but these three patterns are new! I decided to break down the complete process for myself and realized this would be a great and quick class you might enjoy. The benefit is, at the end of it, you have new skills and three new pattern brushes that will prove to be very versatile for you.In this class I'll walk you through:my step-by-step method for making seamless patterns in Procreatemy workflow for use of layers and other great features like snappingadjusting patterns and making them into pattern brushesfully seamless pattern creationmethods for adding color and variety to the brushesIf you're an aspiring pattern designer with a good basic knowledge of Procreate, you'll be able to go through all the steps. This class will benefit anyone who wishes to simplify creation of seamless patterns and methods to improve efficiency.The key concepts I will include:review of my brush alterations and adjustmentsa look at the Procreate Brush Studio and altering brushesapproaches you can take in your creative workThis is an ideal class for you, even if you are not sure what you will use the pattern for, whether it be for fabric design for sites like Spoonflower, scrapbooking paper, custom web graphics, or whatever! Learning new Procreate workflows is always desirable. I guarantee you will create something really appealing, and it's so much fun, once you get the hang of it!Intro to Checkers, Gingham and Buffalo Check Patterns in Procreate This short intro will give you an overview of the class.Lesson 1: Overview and Document Set UpIn this lesson, I will give short history of checkers, gingham and buffalo check patterns. I show you plenty of visuals and you will learn the origins of gingham.Lesson 2: Create a Basic Checkered PatternIn this lesson, I will break down the complete process of creating a basic checkered pattern. I take you through all the steps and at the end of the lesson to even show you an interesting way to add color changing properties to the brush.Lesson 3: Classic Gingham Pattern Brush CreationIn this lesson, I will explain the technique needed for creating the classic gingham pattern. Once it is complete, we will have some fun playing with color dynamics.Lesson 4: Creating a Buffalo Check PatternThis is the lesson in which I teach you about creating the buffalo check pattern. It is a little bit more involved as we need to create a stripe to be used in one of the corners.Lesson 5: Testing the Pattern on a Mock UpIn this lesson, we will experiment with showing the patterns we created on a mock up or two (or three). Doing a test like this helps you visualize things like the scale of the pattern and color choices.Lesson 6: Conclusion, Mockup and Next StepsWe will conclude everything in this lesson. I show you a couple of quick mock-ups with the pattern and we end with a chat about next steps.Concepts covered:Concepts covered include but are not limited to Procreate checkered, gingham and buffalo plaid patterns, layering, Procreate canvas settings, Procreate snapping and guides, Procreate pattern brush creation, Procreate pattern brush color dynamics, the Brush Studio in Procreate, adjusting Procreate brushes, applying color changing properties to abrush, sizing of documents and brushes, workflow best practices, the use of mock ups to test the patterns, painting best practice, Procreate composites, techniques with paints and blending, and much more. You will get.27 minutes of direction from an instructor who has been in graphic design business and education for over 40 yearsknowledge of multiple ways to solve each design challengean outline with links to further researcha list of helpful online sites to further your education into surface pattern designProject DescriptionChallenge yourself today and download and create the three different pattern repeats as described in class. Work through each of the lessons, applying the concepts as I teach them. Try to create all three into brushes, and experiment with changing settings on the brushes such as color variables.
Overview
Section 1: Introduction
Lecture 1 Introduction
Lecture 2 Create a Basic Checkered Pattern
Lecture 3 Classic Gingham Pattern Brush Creation
Lecture 4 Creating a Buffalo Check Pattern
Lecture 5 Testing the Pattern on a Mock Up
Lecture 6 Conclusion, Mock-Up and Next Steps
Life-long learners seeking more information about surface pattern design and using Procreate
Download link
rapidgator.net:
Код:
https://rapidgator.net/file/9a4822206e2037faa52f20c090cacda7/sbcxw.Gingham.Checkers.And.Buffalo.Plaid.Repeats.In.Procreate.rar.html
uploadgig.com:
Код:
https://uploadgig.com/file/download/3015c5ED3f9Fb7fC/sbcxw.Gingham.Checkers.And.Buffalo.Plaid.Repeats.In.Procreate.rar
nitroflare.com:
Код:
https://nitroflare.com/view/733B1FE54B80B81/sbcxw.Gingham.Checkers.And.Buffalo.Plaid.Repeats.In.Procreate.rar
|
|
|
|
|
28.12.2022, 05:52
|
#79875
|
|
Местный
Регистрация: 04.10.2017
Сообщений: 107,495
Сказал(а) спасибо: 0
Поблагодарили 6 раз(а) в 6 сообщениях
|
Git Commands A Complete Workshop

Published 12/2022
MP4 | Video: h264, 1280x720 | Audio: AAC, 44.1 KHz
Language: English | Size: 440.23 MB | Duration: 1h 21m
Learn the best of the Git commands via hands on exercises
What you'll learn
An introduction to git
Branching and Merging in git
Rebasing the branches
Remote and local repositories
And the best practices of using git
Requirements
Basic english knowledge
Basic knowledge of computer and comandline interface
Description
Git is a powerful version control system used by developers for tracking and managing changes in their code. This course will teach you the basics of using Git in order to store and collaborate on code projects, both large and small. You will learn about version control systems and how to use Git to store, manage, and share code. You will learn the basics of creating branches and merging them back into the main branch. You will also learn how to use Git to collaborate with other developers in a distributed environment. The course will also cover the use of Git commands to manage your projects. You will learn how to commit and push code changes, how to review changes made by other developers, and how to revert to previous versions of code. You will also learn how to use the GitHub platform to share your code with others and collaborate on projects. The course will cover the basics of creating repositories, setting permissions, and creating pull requests. At the end of the course, you will have a strong understanding of how to use Git to collaborate on projects with other developers. You will also have a strong understanding of version control systems and the basics of using the GitHub platform for collaboration.
Overview
Section 1: Introduction
Lecture 1 Introduction
Lecture 2 Version Control System
Lecture 3 Why Version Control System
Lecture 4 Different Version Control Systems
Lecture 5 What is Git
Lecture 6 How Git Works
Lecture 7 Git download
Lecture 8 Git Installation
Lecture 9 Confirmation of git installation
Lecture 10 Git Operations and Commands
Lecture 11 Commands to Create Repositories
Lecture 12 Commands for Syncing the Repositories
Lecture 13 Git Configuration Commands
Lecture 14 Creating New Files in Git
Lecture 15 Tracking the Files in Git
Lecture 16 Committing Changes in Git
Lecture 17 Tracking Changes in Git
Lecture 18 To see the List of files in Git Repository
Lecture 19 Syncing Changes into the Remote repository
Lecture 20 Parallel Development and Branches in Git
Lecture 21 How Branching and Parallel Development Works
Lecture 22 Git merging commands
Lecture 23 Commands for Rebasing in Git
Lecture 24 More Useful Commands
Anyone who wants to learn to better collaborate with others on software projects, streamline their workflow, or just learn a new coding skill should take a Git course.,Git is a powerful and versatile tool used by software developers, data scientists, and other developers around the world.,It can help increase productivity and collaboration, making it an invaluable skill to have.
Download link
rapidgator.net:
Код:
https://rapidgator.net/file/df794cf0cd2eff3137944c9463f36d7c/ekaml.Git.Commands.A.Complete.Workshop.rar.html
uploadgig.com:
Код:
https://uploadgig.com/file/download/1e7893e5ef44Bd1c/ekaml.Git.Commands.A.Complete.Workshop.rar
nitroflare.com:
Код:
https://nitroflare.com/view/2763EF264B90183/ekaml.Git.Commands.A.Complete.Workshop.rar
|
|
|
|
Любые журналы Актион-МЦФЭР регулярно !!! Пишите https://www.nado.in/private.php?do=newpm&u=12191 или на электронный адрес pantera@nado.ws
|
Здесь присутствуют: 33 (пользователей: 0 , гостей: 33)
|
|
|
 Ваши права в разделе
|
Вы не можете создавать новые темы
Вы не можете отвечать в темах
Вы не можете прикреплять вложения
Вы не можете редактировать свои сообщения
HTML код Выкл.
|
|
|
Текущее время: 23:46. Часовой пояс GMT +1.
| |